Supported Devices
| Device Type | Variants | Modbus TCP (Ethernet) | RS485 | Curtailment |
|---|---|---|---|---|
| Energy Storage | EH | ⚠️ | ✅ | ✅ |
| ET | ||||
| ET G2 | ||||
| BH | ||||
| BT | ||||
| ES G2 | ||||
| SBP G2 | ||||
| Energy Storage (Old models) | EM | ❌ | 🛠️ | |
| ES | ||||
| ESA | ||||
| SBP | ||||
| Residential | MS G3 | |||
| XS G3 | ||||
| DNS G3 | ||||
| SDT G3 | ||||
| Grid-Tied | MT | ✅ | ||
| MT G2 | ||||
| SMT | ||||
| SDT G2 | ||||
| MS | ||||
| DNS | ||||
| XS | ||||
| Grid-Tied C&I | GT | |||
| HT |
Warning
Warning
Modbus TCP is only available using a Wi-Fi/Lan kit
Configuration
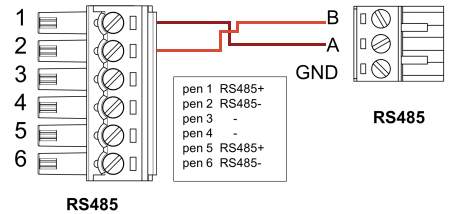
1: Connecting the RS485
2: SolarGo Settings
| Step | Image |
|---|---|
| 2a. Connect to the inverter’s WiFi and open the SolarGo app. | 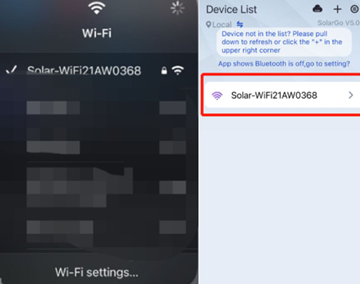 |
| 2b. Click More. | 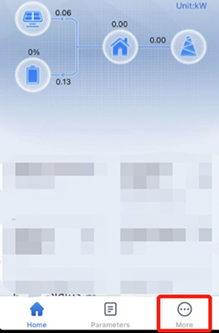 |
| 2c. Click Advanced Setting (you can find the password in the SolarGo manual). |  |
| 2d. Select Grid Parameter Setting. | 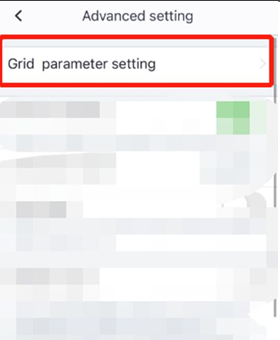 |
| 2e. Turn off Power Limit (If it is on, power from the battery cannot be fed into the grid). | 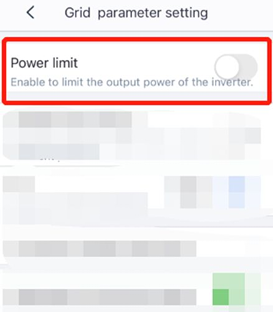 |
| 2f. Go back and click Cancel (these settings will be saved anyway, no restart is needed). | 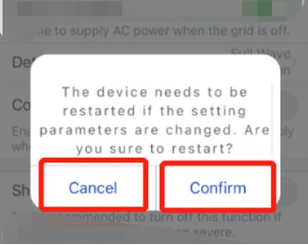 |
3: Battery Settings in SolarGo.
| Step | Image |
|---|---|
| 3a. Select Battery Setting. | 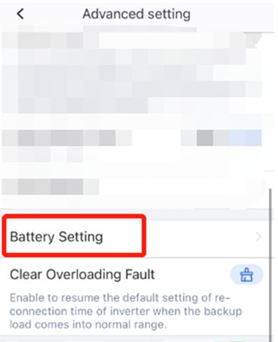 |
| 3b. Turn off SOC Protection. | 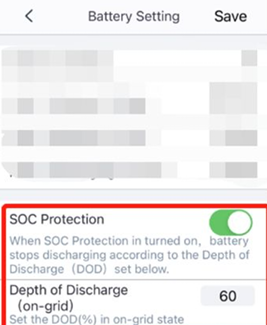 |
| 3c. Go back and click Cancel (these settings will be saved anyway, no restart is needed). | |
Wiring
If you have multiple goodwe devices it is possible to change adresses seperately for each device. Or you can daisy chain them. (https://docs.eniris.be/wiring-best-practices/#wiring)
Last updated May 28, 2026Edit this page